X68000 programming, chapter 2.1 setting up the IDE, Lydux flavour

Following with this series of articles about the Sharp X68000, I’m going to show how to install the programming environment and our ever “hello World”.

First of all, to talk about the Cross-Human68K toolchain which are the libraries and tools that we’ll use to produce executables in the Human68K and to give credit to its author Lydux, member of the forum https://nfggames.com and published on 30th of April of 2012 and that can be found at https://nfggames.com/forum2/index.php?topic=4850.0

This is going to be a transcription of that post in https://nfggames.com

Lydux’s github is https://github.com/Lydux

Downloading the packages needed:

Following his instructions for Windows we have to download Code::Blocks from http://www.codeblocks.org

And the different packages of the toolchain from the following urls:

Binutils-2.22http://nfggames.com/X68000/Development/toolchain/binutils-2.21-human68k-win32-3.zip
GCC-4.6.2http://nfggames.com/X68000/Development/toolchain/gcc-4.6.2-human68k-win32-1.zip
Newlib-1.4.0http://nfggames.com/X68000/Development/libraries/newlib-1.19.0-human68k-1.zip
Make-3.82http://nfggames.com/X68000/Development/toolchain/make-3.82.zip
Human68K wizard for Code::Blockshttp://nfggames.com/X68000/Development/toolchain/codeblocks-wizard-human68k-1.zip

Installing the toolchain:

If you still don’t have the Code::Blocks installed you install it obviously. Once installed you open it up.

Now go the “Settings → Compiler and debugger” menu.

Make a copy of the “GNU GCC Compiler” which presumably will be selected by default and press the button Copy.

Name the new compiler “Human68K GCC”.

Now go to the tab “Toolchain executables” and change the values as in the image below.

There is where you set the path where you decompressed the toolchain.

Another thing you may need is to remove any optimization flag that is for PC in the “Compiler settings” tab.

Adding a project template of Human68K in Code::Blocks:

Finally we’re going to make Code::Blocks give us the option to create a X68000 project so that we don’t need to configure the compiler each time.

In order to do that we are going to unzip the codeblocks-wizard-human68k-1.zip file in the folder C:\Program Files\CodeBlocks\share\CodeBlocks\templates\wizard and edit the file C:\Program Files\CodeBlocks\share\CodeBlocks\templates\wizard\config.script

And inside the block function RegisterWizards(){} we are going to search for some lines like these:

RegisterWizard(wizProject, _T("arm"), _T("ARM Project"), _T("Embedded Systems"));
RegisterWizard(wizProject, _T("avr"), _T("AVR Project"), _T("Embedded Systems"));
RegisterWizard(wizProject, _T("tricore"), _T("TriCore Project"), _T("Embedded Systems"));
RegisterWizard(wizProject, _T("ppc"), _T("PowerPC Project"), _T("Embedded Systems"));

And to add the following line:

RegisterWizard(wizProject, _T("human68k"), _T("Human68K Project"), _T("Embedded Systems"));

Note:

There are reports from people whose executable isn’t well generated. Although it isn’t my case the solution they suggest is to edit the file:

C:\Program Files\CodeBlocks\share\CodeBlocks\templates\wizard\human68k\wizard.script

and inside function SetupProject(project) to change the next line:

oc_x = _T("human68k-objcopy -O xfile $(TARGET_OUTPUT_FILE) $(TARGET_OUTPUT_FILE).X");

for this other:

oc_x = _T("human68k-objcopy -v -O xfile $(TARGET_OUTPUT_FILE) $(TARGET_OUTPUT_FILE).X");

Now you can save the file and create a new project in Code::Blocks and select the template “Human68K Project”

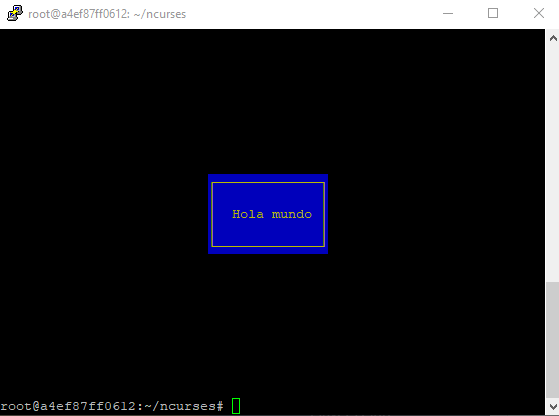
When creating the project you’ll have an easy “hello world” which you can compile and that will build a .X file in the subfolder “default” inside your project.

Installing the emulator:

Presumably you will need an emulator. You can find one here: http://www.gametronik.com/site/emulation/sharp_x68000/

I use the XM6 Pro-68k which is top list.

With the emulator you will also need an operating system. You can find one in https://nfggames.com/X68000/index.php/OperatingSystems/Human68k/

The one I use is Human 68k v3.02 (1993)(Sharp – Hudson)[a].zip

Then you install the emulator and unzip the operating system somewhere.

The file with the operating system has the extension .dim and it represents a disk floppy or a Hard disk.

Every time that the emulator starts you have to mount the operating system in one disk drive as in the picture.

For convenience’s sake you can make a shortcut to start the emulator with the operating system’s disk mounted with this command:

"C:\X68000\XM6 Pro-68k Release 30 (210225)\XM6.exe" "Human 68k v3.02 (1993)(Sharp – Hudson)[a].dim" 

Or wherever you have placed the emulator and the operating system.

In order to test the program we compiled earlier with the Hello World we need to mount the folder where the executable is as it were a floppy disk.

For that in the menu Floppy Drive #1 select Insert directory…

and now look for the folder “default” in your project folder:

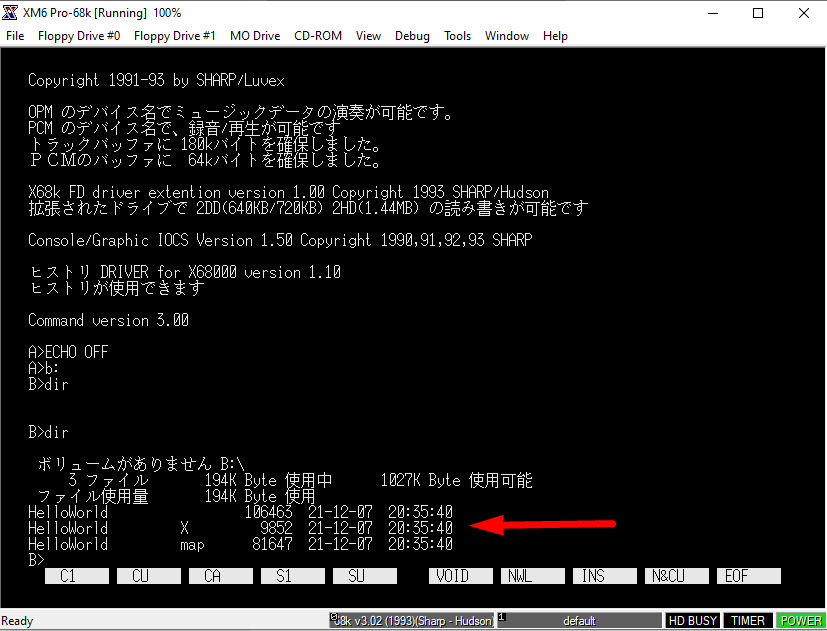
Lastly go to unit B in the same manner you would in MS-DOS, with B:

You’ll need to find the colon in your keyboard because it doesn’t correspond to it.

If you run the command dir you’ll see the files you have in the folder you just mounted.

Like in the picture, among them is the executable file we compiled HelloWorld.X

Now we just have to run it with HelloWorld.

With this we have now our environment ready to make our first programs in the Sharp X68000.

In next articles I’ll explain how to do more interesting things.

In my GitHub you can find some example about which those articles will be about.

https://github.com/FedericoTech/X68KTutorials

Enjoy.

X68000 programming, chapter 1, prologue.

A friend of mina purchased a Japanese computer called Sharp X68000.

This is a computer from late 80s, early 90s with the capability to run arcade ported games of the time.

In Sharp X68000 we can find titles li Final Fight or Street Fighters with nearly full fidelity to the arcades. It’s also famous its Castlevania Chronicles.

It also spectacular was the sound quality of that computer and many games benefited of it.

It was based in the Motorola 68000 microprocessor which was popular in those years and it could be found in computers like Apple, arcades of course and the Sega Megadrive.

It was a MS-DOS like operating system called Human68k. In some versions it even had a windowed graphical interface.

This machine was only sold in Japan and therefore the operating system and the instruction manuals and the escarce information available is in Japanese which makes it very difficult to learn how to do anything with it.

However there is a nicho of people who still make brand new games and demos.

My friend an I think that we can gather all the information available, translate some and develop examples so that others can develop for this machine and that is the purpose of this series of articules about Sharp X68000.

The Sharp X68000 can be programmed in Assembly and C languages.

As I’m not very in at Assembly, what I have researched is how to program in C.

It can be found source code that accesses the hardware to draw in the screen o to place sprites in a similar fashion as it were done in Assembly by knowing the registers and specific memory addresses.

The approach of this serie will be to use operating system calls to access the hardware so that the operating system does the work for us.

First of all I will teach how to install the programming environment with tools that can be found in the Internet.

Afterwards there will be articles about how to load palettes, tiles, to configure sprites, to draw in the buffer, to make use of the DMA, to read from Joysticks and more stuff I haven’t had the chance to research about yet and it will eventually come out.

So don’t miss next issues of this series.

Using vintage tables in nowadays Internet.

I’m a melancholic of my vintage devices. I still have a Nokia Lumia 620 running Windows Phone 8, a Blackberry Playbook and a Samsung Galaxy SCL a part from the phone I normally use.

These old devices still work and I like giving them use. For example reading stuff from Wikipedia on the Playbook.

Since several years I was experiencing that most of the webs no longer worked on then. Not only that the HTML and CSS didn’t show right because they have evolved and their browsers became obsolete. The webs just didn’t download.

They browser said Network Error, that’s it.

The problem is that webs have updated the HTTPS encryption algorithm and if one tries the HTTP version many will redirect onto the HTTPS ant that prevents those devices which don’t support the new algorithm from open up the webs.

I thought one day that someone else must have dealt with the problem and some solution must exist. Perhaps a proxy which makes internet compatible to vintage devices. So I search the Internet and I found a post in some forum that commented about a project called WebOne.

WebOne is a proxy develop by Alexander Tauenis and it’s a software made in C# that makes the HTTPS request compatible with your own device.

The goal therefore is to have this proxy running on a machine and make your table do the request through it.

I managed to install it in my Raspberry Pi 3 and in this article I’m going to explain the steps to achieve it.

LWhat I normally do is to use docker and start with a clean Ubuntu 18.4 image but it should work on a bare metal operating system.

The steps are the following:

First of all we need to update Apt and install wget and libicu-dev

apt-get update
apt-get install wget libicu-dev

Now we have to unload a .NET runtime. It has to be .NET Core 3.1.
It can be downloaded from this URL https://dotnet.microsoft.com/download/dotnet/3.1

At the time I did it I chose ASP.NET Core Runtime 3.1.19 but I also tested it with SDK 3.1.413.

As I’m installing it in the Raspberry Pi which runs Linux and the microprocessor is ARM I picked aspnetcore-runtime-3.1.19-linux-arm.tar.gz. You has to pick the fittest to the computer we are going to run it.

wget https://download.visualstudio.microsoft.com/download/pr/151dda42-4bbe-4a05-a3bf-ccb5803a2a28/8e0b0ae365850d455efbf2afcd7c6768/aspnetcore-runtime-3.1.19-linux-arm.tar.gz

Now we download WebOne from Alexander Tauenis’s Git.

wget https://github.com/atauenis/webone/releases/download/v0.11.0/webone.0.11.0.linux-armhf.deb

Now we install it. In my example I installed it in the folder root because it’s a Docker container. You can do it in a different folder.

export DOTNET_ROOT=/root/dotnet
export PATH=$PATH:$DOTNET_ROOT
mkdir -p $DOTNET_ROOT 
tar zxf aspnetcore-runtime-3.1.19-linux-arm.tar.gz -C $DOTNET_ROOT
dpkg -x webone.0.11.0.linux-armhf.deb ~/WebOneDeb 

and now to run it use run the command:

dotnet WebOneDeb/usr/share/webone/webone.dll WebOneDeb/etc/webone.conf > /dev/null

Now WebOne is running and it accepts calls on the port 8080.

Now in the device you have to set up the proxy, set the url of the comupter where you are running Web one and the port 8080 and you can now use internet on it.

I hope this tutorial is helpful.

Ncurses and PHP I

Back to the 2005 I did a course on Linux administration and we over saw a bit of Ncurses.

Ncurses is the open implementation of Curses which is a library that provides functionalities to draw the screen, keyboard and mouse management in terminals in text mode regardless of the terminal type.
This is that there are terminals with colours or only 2 colours, different number of columns and rows, character set as well as keyboard and mouse functionalities. Ncurses takes care of all for us.

Formulario de instalación de Linux (wikipedia)

Ncurses is develop in C but there are interfaces to access its functionalities from other languages like Python, Perl, JavaScript, PHP and many others.

I work with PHP which is a language mainly for web development and I thought it was interesting to be able to use it for something else other than the web and I remembered this library so I decided to research about it and see what we can do with PHP and Ncurses.

In the lists of commands I’ll give below I assume that with work with a fresh Ubuntu installation and that we have to install all the dependencies fro scratch as well as we are super user.

Installing Ncurses in PHP5.6

The reason is that the Ncurses extension wasn’t ported to PHP7 but there is a way to install it that I’ll explain later.

The ncurses extension for php isn’t available in APT but in PECL so we need to install it first.

  1. apt-get update
  2. apt-get -y install software-properties-common
  3. add-apt-repository ppa:ondrej/php
  4. apt-get update
  5. apt-get -y install php5.6-dev php5.6-xml libncurses5-dev libncursesw5-dev
  6. pecl install ncurses
  7. echo "extension=ncurses.so" > /etc/php/5.6/cli/conf.d/20-ncurses.ini

Now we can check that it’s installed with the following command:

php -m | grep ncurses

Installing Ncurses in PHP.7

n PHP 7 the process has more steps because because if we tried to install Ncurses with PECL, at step 6 it would give error. Instead we are going to download it and apply a patch by hand.

  1. apt-get update
  2. apt-get -y install wget php-dev libncursesw5-dev libncurses5-dev php-pear
  3. cd /root
  4. pecl download ncurses
  5. mkdir /root/ncurses
  6. cd /root/ncurses
  7. tar -xvzf /root/ncurses-1.0.2.tgz
  8. wget "https://bugs.php.net/patch-display.php?bug_id=71299&patch=ncurses-php7-support-again.patch&revision=1474549490&download=1" -O ncurses.patch
  9. mv ncurses-1.0.2 ncurses-php5
  10. patch --strip=0 --verbose --ignore-whitespace <ncurses.patch
  11. cd ncurses-php5
  12. phpize
  13. ./configure
  14. make
  15. make install
  16. cat <<'EndOfHereDoc' >/etc/php/7.2/mods-available/ncurses.ini
    ; configuration for php ncurses module
    ; priority=20
    extension=ncurses.so
    EndOfHereDoc
  17. ln --symbolic /etc/php/7.2/mods-available/ncurses.ini /etc/php/7.2/cli/conf.d/20-ncurses.ini
  18. php -m | grep ncurses

Sample code:

Here I leave a PHP script that draws a frame in the middle of the screen with the phrase hola mundo.

#!/usr/bin/env php
<?php
/*
 * We force this environment variable to “linux because in some terminals
 * the border that we are going to use to draw the dialogue box doesn’t
 * show well in Putty nor in colour without this value.
 */
putenv('TERM=linux');

//Iniciamos ncurses.
$ncurses_session = ncurses_init();

//We save the settings there were before running the script
ncurses_savetty();

//we check whether the terminal is in colour.
if (ncurses_has_colors()) {
    ncurses_start_color();
	//we create an ink and paper colour combination.
    ncurses_init_pair(
		1,						//index
		NCURSES_COLOR_YELLOW,	//ink colour
		NCURSES_COLOR_BLUE		//papel colour
	);
	//we set this colour by default.
    ncurses_color_set(1);
}
/**
 * we createe "window" with the values 0.
 * This creates a "window" of the size of the screen.
 * The window is a concept that will be explained.
 */
$ventana_principal = ncurses_newwin(
	0, //rows
	0, //columns
	0, //y
	0  //x
);

//We use the window to capture the size in columns and rows by reference.
ncurses_getmaxyx($ventana_principal, $filas, $columnas);

//We create an smaller window to draw inside.
$my_windows = ncurses_newwin(
	5,	//rows
	15,	//columns
	($filas - 5) / 2,		//y
	($columnas - 15) / 2	//x
);

//we set the same colour we created above to draw in the window.
ncurses_wcolor_set($my_windows , 1);

/*
 * the loop is to paint the background of the window
 * we paint 5 rows of spaces of blue colour
 */
for($y = 0; $y < 5; $y++){
	//We set the cursor on the corresponding row.
	ncurses_wmove($my_windows , $y, 0);
	//We paint a 15 space character line.
	ncurses_whline(
		$my_windows ,	//handler of our window.
		ord(' '),		//Chracter we are going to draw. It has to be converter indo ASCII.
		15
	);
}

//now we write the text of our window.
ncurses_mvwaddstr(
	$my_windows ,	//handler of our window.
	2,				//y, relative to the interior of our window.
	3,				//x, relative to the interior of our window.
	'Hola mundo'	//text
);

//now we draw the frame around.
ncurses_wborder(
	$my_windows ,	//handler of our window.
	0, //character to paint line on the left, 0 =│, ord('|') for another
	0, //character to paint line on the right, 0 =│, ord('|') for another
	0, //character to paint line on the top, 0 = ─, ord('-') for another
	0, //character to paint line on the bottom, 0 = ─, ord('-') for another
	0, //character to paint corner top-left 0 = ┌, ord('+') for another
	0, //character to paint corner top-right 0 = ┐, ord('+') for another
	0, //character to paint corner bottom-left 0 = └, ord('+') for another
	0  //character to paint corner bottom.right 0 = ┘, ord('+') for another
); // border it

//now we flush on the screen the window we draw above.
ncurses_wrefresh($my_windows);

//we reset the settings there were before we run the script
ncurses_resetty();
//we close ncurses
ncurses_end();

Copy and paste this script in a file called test.php and run it with the following command:

php test.php

It should look like this:

I hope you find it interesting.

RAID 0 in Raspberry PI with pen drives.

I have a Raspberry PI 3 to do experiments and when I’m not using it it runs Boinc which is a distributed computing software I will talk about another day.

This software makes an intensive use of disk access and I thought of a way to save the SD card for those who use one or as in my case to make less use of the HDD I have plugged by USB, It would be to install that program on a pen drive.

It turns out that I have many pen drives. Some of a few Gigabytes but also, the older ones of some tens of megs and I thought of an experiment to make use of those old pen drives whilst I protect my HDD.

The solution I thought of was to create a RAID 0 with the pen drives.
RAID 0 is a setting for which It’s possible to mount a filesystem in a number of store devices as is they were only one.
There are other configurations as for example to mount two devices in which one is a replica of the other for error prevention.

RAIDs can be hardware in which the operating system only sees a device instead of the bunch of then that compound it, or it can be by software in which the operating system takes care of it and it’s transparent for the user and the applications.

The software I found is called mdadm and it’s very easy to install in the Linux of Raspberry PI:

sudo apt-get install -y mdadm

With the command lsblk we can see the device files of our pen drives.

Now well, let’s suppose that we have two pen drives and their devices are /dev/sdd1 and /dev/sdb1.

We would crate the RAID device with the following command:

sudo mdadm --create /dev/md0 --raid-devices=2 --level=0 /dev/sdd1 /dev/sdb1

Now we need to save the configuration for Linux to remember it next time how to mount the device /dev/md0. We use the command:

sudo mdadm --detail --brief /dev/md0 >> /etc/mdadm.conf

Now we have to “assemble” the new RAID. This internally stores some data about how mdadm has to access the devices. The order and that stuff. Remember it for later.

sudo mdadm -A /dev/md0 -f /dev/sdc1 /dev/sdb1

At this point now we can format the new device /dev/md0 as it was anyother:

sudo mkfs.ext4 /dev/md0

And to mount it. For this example I will use the folder /mnt/raid:

sudo mount /dev/md0 /mnt/raid

And now we can access it as we would with any other device even thought it’s compounded by two.

Now we have a problem. If we restart the computer it won’t mount it anymore. This is because returning to the “assembling” step there is an issue that has to do with mdadm because in previous versions it made that assembly in a way whereas in posterior versions it does it in another way and when Linux tries to reconstruct the RAID it tries in the legacy mode instead on the modern one. So I’m going to explain how to fix this scenario and afterwards I’ll fix it definitely.

First we stop the RAID:

sudo mdadm --stop /dev/md0

Now we put the value 2 inside that file to set the mode.

sudo echo 2 > /sys/module/raid0/parameters/default_layout

and assemble it again RAID

sudo mdadm -A /dev/md0 -f /dev/sdc1 /dev/sdb1

Now we can mount it as before.

As this is unpractical we need the Raspberry Pi to know the mode to re-assemble the RAID.
For this we need to pass some parameters to the kernel on bootstrap.
This is done by editing the file /boot/cmdline.txt and adding in the same line the parameter raid0.default_layout=2. In my case it’s between fsck.repair=yes and rootwait.

With this the Raspberry Pi Linux starts knowing the mode it has to assemble the RAID with.

I hope it’s helpful to you, you’ll tell me in the comments.

Google Multi-Calendar at Blackberry Playbook

Hi folks.

A way to organize myself is by using the google calendar. I use it because it’s friendly, I can keep some calendar to represent different issues in different colours which is very useful because I can distinguish easily some events from others.

But Google Calendar is an online application and I’d like to carry it with my on my blackberry playbook, so I should set it up on it.

Blackberry Playbook has a wizard to configure an email, contact and calendar account from different providers. While a Microsoft email account is easy, because the device sets everything up automatically including all calendar you have, with google it just takes the first calendar it finds. If you have more like me, you won’t be able to see them.

The way to get to set them up is one by one.

After setting up the main one, you have to add a new Email, Calendar and Contacts account as the image below:

IMG_00000108

And then filling out the form. This  time, in the description field, put the name of the calendar as you want it to be shown on the calendar application.

On the User name field, write down your user name as always (I think It doesn’t matter what you put on it).

On the Email address field, you have to make up your email address. Normally you may use the same but making on it some difference like adding numbers. Blackberry Playbook is not going to use neither username nor email, and password either. But you have to write it down because if not, the form validation is not going to allow you carry on.

On password, a password.

IMG_00000107

Server Address field is the key in this subject. The server address is an URL from google.

Your main calendar would require an username and a password because you may add new appointments on it, but what we are doing with the other ones is add them on our playbook by public address. This is an address you can share to others. that’s why you don’t really need neither an user name, nor an email, nor a password.

Sever Address field would contain an address as this:

https://www.google.com/calendar/dav/CODE-OF-CALENDAR%40group.calendar.google.com/events

What you have to do is to go to your calendar setting of the calendar you want to set up on your Blackberry playbook and copy the code of calendar like in the picture below:

code of calendar

And put it into the address above, in the Server Address of the wizard form.

You have to do this with each calendar you want to show on your Blackberry Playbook.

IMG_00000112

This is it. Thank you for visiting.

Installing blackberry playbook emulator

Hi folks.

I wanted to write an article about how to set up more than a calendar from google in the blackberry playbook. For getting some screenshots I tried to install the Playbook emulator but I found a problem interesting enough as writing this other article before that one in mind.

Playbook emulator is actually a x86 VMware image which runs under VMware player.

You may get the emulator at blackberry web page download section here.

The problem I had was the installator gave “Error 2 windows to load the Java VM” and then didn’t work anymore.

After a lot of tries and researching I found that the problem was due the Runtime version I’m using.

I used to have a lot of versions installed from 5 to the latest but now I just have the JRE 8. That is because I have the auto update activated so the Oracle guys have removed my previews versions. No only that, they say the JRE7 is not for download anymore.

I think they only say that to encourage you to forget previews versions of JRE8 because you could download it from them, here.

Once Installed the JRE7 you can now install the Playbook emulator for VMware.

Now the installator doesn’t give you that error anymore but depending which version of windows you are using you’ll get another challenge.

The installator is not compatible with your current UI. This is something I have had to deal other times. the own error is telling you what you need to do. Just launch the installator from command line (cmd) using the param -i GUI.

This is it. Thank you for visiting.