
In this chapter I’m going to explain how to produce digital sound files compatible with X68000 and how to play them with some demos.
The X68000 comes equipped with the chip Oki MSM6258 ADPCM which makes it able to encode and decode sound files in Adaptive Differential Pulse-code Modulation (ADPCM) format.
The ADPCM format is vendor-dependant, each company has its own so we need a way to encode sound in the specific format X68000 works with.
To follow this tutorial you will need some software. I’ll assume that you have Git and the X68000 toolchain properly installed. If you haven’t yet you can follow these two articles:
The IDE in those articles is CodeBlocks which comes with MinGW as GCC compiler.
We will build a program from the sources we need to convert raw WAV into raw ADPCM.
You´ll also need Audacity which is an Open-source software for digital audio edition.
Understanding Digital sound.
Before we put hands on I think it is important an introduction on digital audio.
Sound is a physical phenomena that happens when energy propagates through the air in the form of air pressure waves. These waves are the sound we hear.
In nature waves are analogical and they are represented by continuous values which means that between two values there can be infinite smaller values.
Computer are machines that work with discrete values which means that between two values there are values that can’t be represented therefore, some information from the analogical realm is lost.
When digitalizing sound, computers take samples or snapshots of these waves at regular intervals called frequency, and these values, which are the amplitude of the waves, are represented by a number with a limited precision.
Probably you are familiar to the terms 44100 Hz 16bit CD quality. This means that to reach the CD quality we need 44100 samples per second, that is to say, 44100 slices of the waves each second and each slice is represented by 16 bit signed integer values.
With these two values we can draw a wave with a “resolution” of 44100 x 65,535 taking into account that these 16 bit values have sign so they are between -32,768 and 32,767.
Adaptive Differential Pulse-code Modulation (ADPCM)
Following the example of the CD quality above, to store one second with such sample rate and bit depth requires 88,200 bytes per channel. Mono sound uses one channel but stereo sound uses two.
Therefore one minute is over 5 mega bytes per channel. This is why we don’t store digital audio in a raw format but we compress it in MP3 or other formats in order to save disk space.
Back in the days of the X68000 we didn’t have MP3 but raw formats and the store capacity was at premium.
There is another way to digitally represent waveforms and that is with Adaptive Differential Pulse-code Modulation (ADPCM).
Instead of storing the amplitude of the wave in each sample which takes a 2 bytes for each of them, we store the “delta” which is the difference between one sample and the next.
The differences between samples most of the times can be represented by smaller values.
We still may have scenarios where the difference between two samples require the 2 bytes.
To solve this problem ADPCM implements a table with the 50 most common values between samples. These values are actually approximations and are designed to suit some sound requirements.
So, instead of storing amplitudes or differences between samples we store indices of this table per sample which takes less than a byte and saves storage at the cost of losing some information with still acceptable quality.
Each vendor had their own table to fit their own needs and for X68000 the vendor is Oki and the table is implemented in the chip Oki MSM6258 ADPCM.
Required Software
Now that we know how digital sound works and that we need to produce it in ADPCM format we can put hands on.
WAV to ADPCM converter.
First of all, we need a program that turns 16 bit signed integer waves into ADPCM compatible with X68000.
In github I found such program at https://github.com/superctr/adpcm It’s been developed by the user superctr and it’s of public domain.
As a first step we are going to compile this program.
git clone https://github.com/superctr/adpcm
cd adpcm
make
If you are in windows and have Mingw64 you can run mingw32-make instead of make.
Now we should have the adpcm.exe
Audacity
If you don’t have Audacity yet you can download it for free from https://www.audacityteam.org/download/
Converting a sound file into X68000 ADPCM format
In Audacity we can record sound or we can open some sound file like a WAV or MP3.
Either way we need to take into account that if the sound is to fit in a floppy disk we should work with not longer than 2.5 minutes. This is because the resulting file will take roughly 469014 bytes per minute.
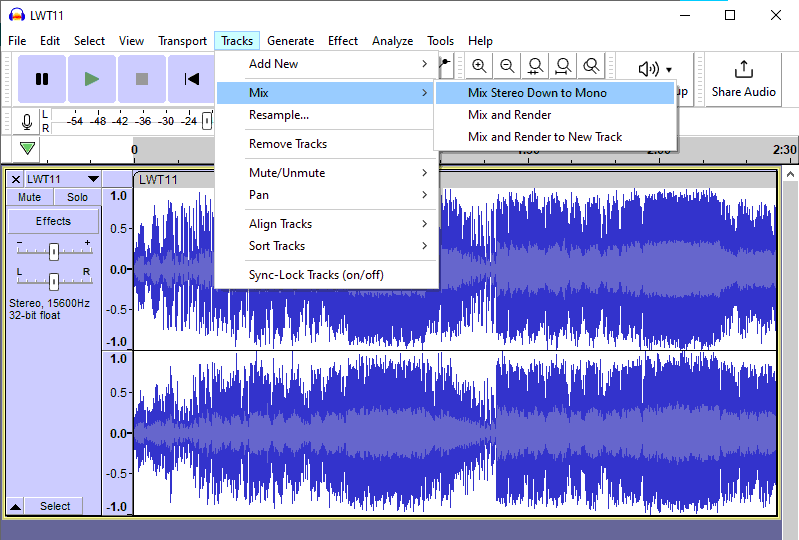
Once we have the audio from either microphone or any audio format, the first step is to make sure that it’s mono as X68000 play ADPCM music in mono.
In order to do that we do Track / Mix / Mix stereo down to mono
X68000 supports the following sample rates: 3.9Khz, 5.2Khz, 7,8Khz, 10,4Khz and 15,6Khz
In our example we are going to use the highest, the 15.6Khz, so we need to resample the sound to that sample rate.
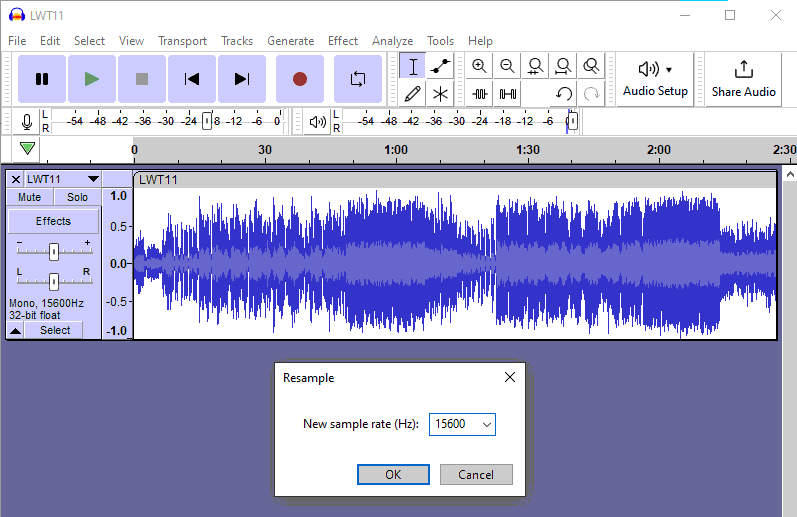
We need to go Track/Resample:
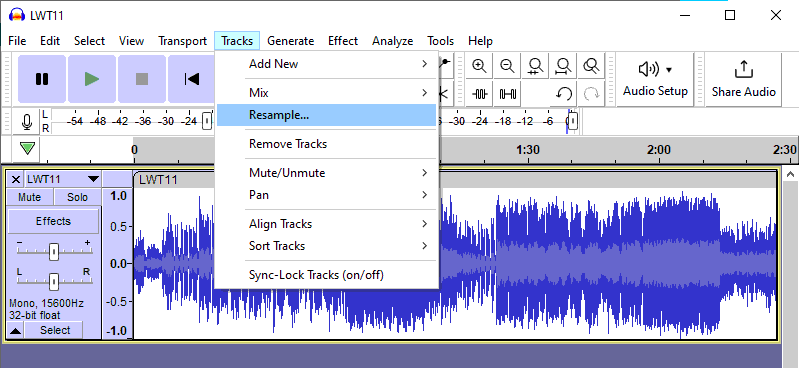
and enter the number 15600 in the dialogue.
Now we need to set that the audio is 44100, although it isn’t. Right click on the track and rate back to 44100
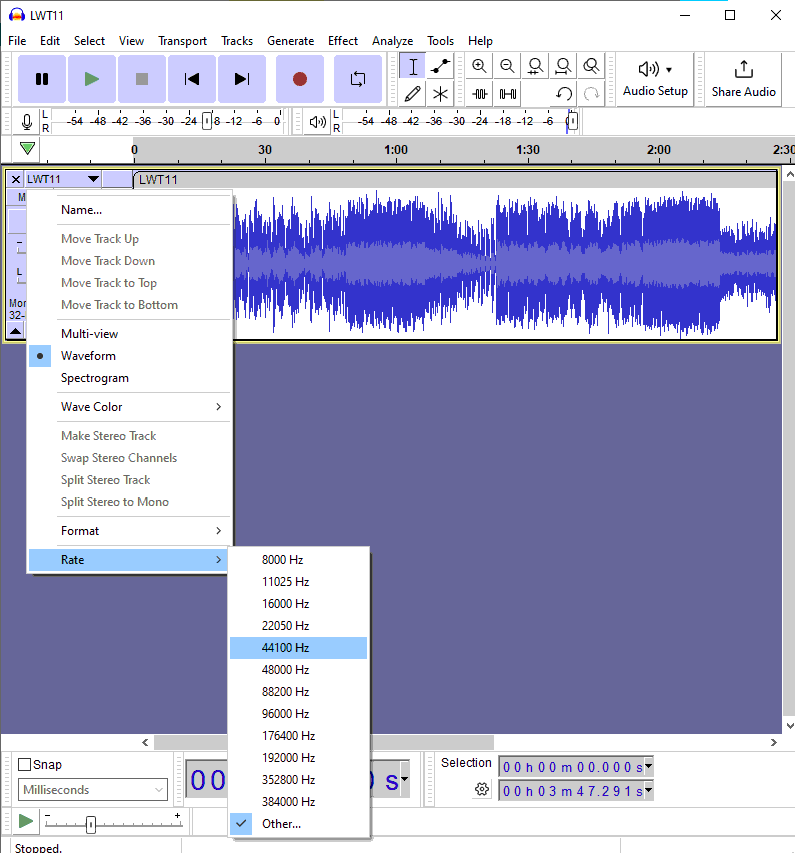
If we now play the sound it would run nearly 3 times faster. Setting the rate as it were 44100 is necessary for the adpcm.exe program to encode the audio correctly. If we left it as 15600 it would get encoded and wound in the X68000 as over 3 times slower.
Now we need to export the sound. We do File / Export / Export Audio
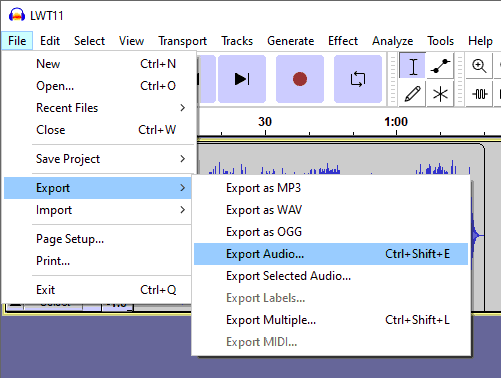
And in the dialogue we pick a folder, ideally where the adpcm.exe program is, and in the drop-down header we select RAW (header-less) and in the drop-down encoding Signed 16 – bit PCM.

In the next step we are going to encode the sound we just exported as Raw (header-less) Signed 16bit PCM into Oki’s ADPCM by using the adpcm.exe program we compiled earlier.
If we open a command line console and go where adpcm.exe is and we run adpcm.exe we´ll see its options:
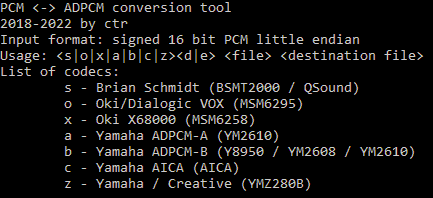
As we can see we can encode the file into several formats and among which we have Oki X68000 (MSM6258)
We just need to run the following command:
adpcm.exe xe music.raw result.rawThis should generate the file result.raw in the format that X68000 can understand.
Now, to play this file we need a program in X68000.
In my github I have 3 programs that can play this file at the addresses: https://github.com/FedericoTech/X68KTutorials/tree/main/ADPCM
https://github.com/FedericoTech/X68KTutorials/tree/main/ADPCM2
https://github.com/FedericoTech/X68KTutorials/tree/main/ADPCM3
There are two files, ADPCM.cbp which is the codeblocks project file and main.c which is the program.
Download both and compile it for X68000 with Codebloks.
Now If you have an original X68000 you can try copying the generated program ADPCM.x and the audio file result.raw in a floppy disk.
If most probably you don’t have the original computer you’ll need an emulator.
With XM6-pro you need to put the executable ADPCM.x and the result.raw files in a directory and mount it as it was a floppy disk.
Whether you are testing it in the original X68000 or the XM6-pro, you just need to go to the unit:
B:and run the program with the command:
adpcmProgram explanation
If you study the source code of ADPCM from my github you’ll see that we open the file with _dos_open, then we check the size with _dos_seek, we allocate memory with _dos_malloc room for two chunks.
With _dos_read we load the first chunk from the floppy disk.
Then we start a loop that repeats as long as we didn’t finish playing the sound.
In each loop we play a chunk of music with the function _iocs_adpcmout(buffer, mode, size)
Buffer is the address where the music starts.
Mode is a 16 bit word of flags where we tell by flags things like the sample rate and whether we want to play the sound in both speakers, the left speaker, the right speaker or non.
Remember that the music itself is mono but we can redirect it to one speaker or the two.
Size is the amount of data we want to send. It’s important to say that if the size is 65280 or less, the return is immediate and we can do something else whilst the music plays but if it’s more than that the CPU will wait and we won’t be able to execute any code until the music stops.
In this program the main loop loads two chunks of music alternatively each time to feed _iocs_adpcmout. As the chink is not larger than 65280 bytes we can execute a nested while loop that runs if the music is playing.
We can check whether the music is playing with the function _iocs_adpcmsns which tells us the current state of the music. In our loop we check whether it isn’t idle.
Inside the loop we test whether any key of the keyboard has been hit with the line if(_dos_inpout(0xFF) != 0). If so we exit the two loop.
If the function _iocs_adpcmsns says that the music has finished, we feed _iocs_adpcmout with the next chunk until there is no chunk left.
The other two programs ADPCM2 and ADPCM3 from my github are versions that run the music but making use of the functions _iocs_adpcmaot and _iocs_adpcmlot respectively.
If we send chunks of up to 65280 bytes we can leave the music playing on its own and we have the CPU available to run something else at the same time. This is possible because the functions _iocs_adpcmout, _iocs_adpcmaot and _iocs_adpcmlot make use of a dedicated DMA channel that frees the CPU from moving data from memory to the music device.
